Wednesday, January 11, 2012

Buon Anno! Homemade Pasta with Bolognese Sauce for the New Year

Who doesn't love pasta?  I have wanted to tackle homemade pasta for years.  My friend Heather was kind enough to gift me the pasta KitchenAid attachment a few years ago, but I was too intimidated to use it ha! Last weekend I was fortunate enough to learn first hand from Chef Carla Callini in a private lesson with my friend Sam!  She learned from her Italian grandmother and I'd bet she could do it in her sleep.  All her recipes are in her head, so I followed her closely with a pen and pad in hand.  It seemed so easy working with Carla, but when I got home and tried to make some pasta with my kids I put too much water in the mix and it was a disaster.  I kept trying until I finally got it right this past Sunday. I don't think I will ever buy boxed pasta again.Thank you Carla- molto apprezzato!  
What's better to put on fresh pasta than Bolognese sauce? It was a perfect dish to make Sunday while watching the Giants win and advance in the playoffs.
I spent years trying different bolognese sauces. They were all good, but nothing I would blog about.  One day at work my friend Kevin Kelly raved that his sister-in-law Jeanette's sauce was the best.  I got the recipe from her and it's by far the best bolognese recipe I've come across. I have been making it for years!  


Carla's Pasta recipe:
1 cup of flour (King Arthur's 00 flour- looked in many grocery stores including Trader Joe's and Whole Foods and haven't found it, but did find it online @ amazon.com)
3/4 cup of semolina flour (Whole Foods brand is Bob's Red Mill)
Water (add spoonfuls of water until the dough came together)
1 beaten egg 
1/2 teaspoon of salt


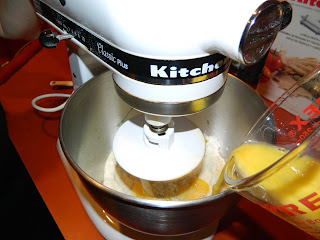
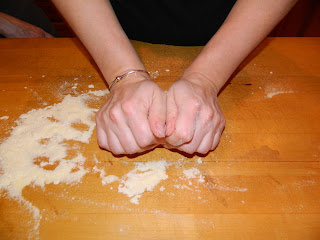
In the KitchenAid with the dough hook attached put both flours and the egg and mix.  When the dough starts to form add water as necessary until the dough forms a ball.  Then remove, knead it (on lightly floured surface) until it's as Carla would say "smooth as a baby's butt" and satiny and elastic.  Let dough rest for a few mins with a damp towel in a draft free space.
Attach the pasta roller to the KitchenAid and roll dough into a log and cut off one inch pieces. Pinch the top of the inch piece and push through the roller on the "1" setting then repeat on "2", "3", "4" and lastly on "5". You should now have what looks like a lasagna sheet. Either hang the sheet on a pasta drying rack or put back on the floured surface. Continue the same process with the rest of the dough until you've rolled it all out into sheets. Change the KitchenAid attachment to the fettuccine cutter.  Slide the pasta sheets into the cutter and hold them as they come back out as fettuccine.  Put back on drying rack to rest while you finish with the rest of the pasta sheets.  Once you are done you are ready to boil.  Fresh pasta boils very quickly so just a few minutes and it's ready for the sauce.


Jeanette Kelly's Bolognese Sauce:
5 tablespoons of butter
2 tablespoons each of minced onion, carrot and celery
3/4 pound meatloaf mix (ground chuck, ground veal and ground pork)
salt and pepper to taste
1 cup of whole milk
1 cup of dry white wine
1 28- ounce can of diced tomatoes with their juices
Freshly grated Parmesan cheese (for the table)
I also add chopped fresh basil and 3 cloves or minced garlic


1. Heat 3 tablespoons butter in a large, heavy bottomed Dutch oven over medium heat.  Add onion, carrot and celery and saute until softened, but not browned then add the minced garlic (about 6 minutes).  Add the ground meat and 1/2 teaspoon of salt; crumble the meat into tiny pieces with the edge of a wooden spoon. Cook, continuing to crumble the meat just until it loses its raw color but not yet browned (3 minutes).


2. Add the milk and bring to a simmer; continue to simmer until the milk evaporates and only clear fat remains (10-15 minutes).  Add the wine and bring to simmer; continue to simmer until the wine evaporates (10-15 mins).  Add the tomatoes and their juices and bring to a simmer.  Reduce the heat to low so that the sauce continues to simmer just barely, with an occasional bubble or two at the surface, until the liquid has evaporated (3 hours).  Add chopped basil and adjust the seasonings with extra salt to taste.  Keep the sauce warm.  The sauce can be refrigerated in an airtight container for several days or frozen for several months.  Warm over low heat before serving.


3. Bring water to a rolling boil in a large pot.  Add 1 tablespoon salt and the pasta.  Cook until al dente, drain the pasta leaving some water dripping from noodles.  Toss the sauce and remaining 2 tablespoons butter.  Serve immediately. 


** NOTE I have always doubled this recipe so I can freeze some.


Thursday, December 29, 2011

Chocolate- Raspberry Swiss Roll

After telling my mom I would bring dessert for Christmas dinner I went searching online for something different, but special enough for the holiday.  I found this recipe on FoodandWine.com.  It requires time, but the results are worth it. I baked the cake after coming home from the Christmas Eve Giant's game (Go Big Blue), assembled it and chilled it over night.  I would definitely recommend using a kitchen towel to roll the cake.  I was a little anxious that it was all going to fall apart so I didn't roll as tight as it could have been.  Christmas morning I made the easy chocolate sauce.  I used a cookie rack with a sheet of parchment paper under it to catch the chocolate.  I put the cake on the rack and poured the chocolate sauce over it.  The chocolate didn't soak the bottom of the cake and the parchment paper made for an easy clean up.  I added some raspberries to the top of the cake and put it back in the fridge to harden for a few hours.  Next time I may try it with a different flavor of jam or maybe chocolate moose.  It was a hit with my family, my cousins from Ireland thought it was "lovely".  Tried and true.  

http://www.foodandwine.com/recipes/chocolate-raspberry-swiss-roll

Chocolate-Raspberry Swiss Roll

  CAKE

  1. 5 large eggs, separated
  2. 1/2 cup plus granulated sugar
  3. 1/2 teaspoon pure vanilla extract
  4. 1/2 cup cake flour
  5. 1/2 teaspoon salt
  6. 4 tablespoons unsalted butter, melted
  7. 2 tablespoons confectioners' sugar
  8. FILLING
  1. 1 1/2 cups heavy cream
  2. 2 teaspoons granulated sugar
  3. 1/2 teaspoon pure vanilla extract
  4. Pinch of salt
  5. 1/4 cup plus 2 tablespoons seedless raspberry jam
  6. CHOCOLATE GLAZE
  1. 1/2 pound bittersweet chocolate, chopped
  2. 3/4 cup heavy cream
  3. 1/4 cup milk
  4. 1/4 cup sugar
  5. 4 tablespoons unsalted butter, at room temperature
  6. Raspberries, for garnish
    1.   Preheat the oven to 350°. Butter a 10-by-15-inch jelly roll pan and line it with parchment paper, then butter the paper. In a medium bowl, beat the egg yolks with 1/4 cup of the granulated sugar and the vanilla until fluffy, about 3 minutes. Scrape the mixture into the bowl and fold in the flour.
    2.    In a clean bowl using a clean whisk, beat the egg whites with the salt at medium speed until soft peaks form. Gradually add the remaining 1/4 cup of granulated sugar and beat until the whites are glossy. Using a rubber spatula, fold the whites into the yolk mixture until no streaks remain. Quickly fold in the melted butter. Spread the batter in the pan. Bake in the lower third of the oven for 20 minutes, or until golden and puffy. Let cool in the pan on a rack.
    3.    Run the blade of a knife around the edge of the cake pan. Dust the cake with the confectioners' sugar and cover with a sheet of plastic wrap and a clean kitchen towel. Top with a cutting board and, holding both the board and pan, invert the cake. Rap the board against the table, then remove the pan and carefully peel off the paper.
    4.    In a large bowl, whip the cream with the granulated sugar, vanilla and salt to stiff peaks. Using an offset metal spatula, spread the raspberry jam on the cake. Spread the whipped cream evenly over the jam. Begin rolling up the cake from the long side, as tightly as possible, using the kitchen towel and plastic wrap to help shape the roll. Wrap the roll tightly in the plastic and transfer to a baking sheet. Refrigerate for at least 6 hours or, preferably, overnight.
    5.    Put the chocolate in a bowl. In a saucepan, stir the cream, milk and sugar over moderate heat just until the sugar is dissolved. Pour the hot cream over the chocolate; let stand until the chocolate is melted, 3 minutes. Whisk until smooth, then whisk in the butter and let cool slightly.
    6.    Discard the plastic wrap and transfer the cake to a rack. Pour half of the chocolate glaze all over the top and sides and spread it evenly with an offset spatula. Spread the remaining glaze all over the cake and refrigerate until set, at least 2 hours. Garnish the top with raspberries. Transfer the cake to a platter, cut into slices and serve.
    MAKE AHEAD The chocolate-glazed Swiss roll can be refrigerated for up to 2 days before slicing and serving.

    Friday, December 23, 2011

    Classic Fondue

    My first memory of fondue was a fondue party my cousin Kathleen had in the 70's. I thought it was so chic and cool.   I hosted my first fondue party two summers ago at my summer home in the Catskills. I searched the internet and found this classic fondue recipe from the New York Times (Dining and Wine section, January 2008).  The first time I used a regular pot and made it on the stove top. It turned out fine, but we had to keep heating it up.  Since then I have graduated to a fondue set, which has a fuel dish to keep it warm without reheating.  The first few times I made this recipe I grated the cheese by hand.  This was both painful (when my knuckles hit the grater) and time consuming.  Now I use a food processor- not only is it easy and fast, but the pieces of cheese are all uniform and melt better.  Don't use the shredded cheeses you can buy in the grocery store, because they use preservatives to prevent the cheeses from clumping in the bags and you don't want that in your fondue.  Since my first party upstate, I've made this fondue for dates, book clubs and most recently it was requested by Sara for her tree trimming party.  I always stick to this recipe, but occasionally will throw in some cheddar I have in my fridge.  You can dip any number of things in the delicious cheese.  I'm a fan of cooked small potatoes, cut up olive bread and baguettes, green apple slices and par boiled carrots and broccoli.  It's delicious and a crowd pleaser! Maybe you're having friends over for the holidays?  This is an easy and satisfying dish to leave out.
    Happy Holidays!


    Classic Fondue

    1 small garlic clove, halved
    1 cup dry white wine
    3/4 pound Gruyère cheese, grated
    3/4 pound Emmenthaler, raclette or Appenzeller cheese, grated
    1 1/2 tablespoons cornstarch
    1 to 2 tablespoons kirsch (optional)
    Kosher salt, to taste
    Freshly ground black pepper, to taste
    Freshly grated nutmeg, to taste (optional)
    Crusty bread cubes; steamed broccoli or cauliflower; carrot, celery or fennel sticks; cubed apple; seedless grapes; clementine sections; cubed salami, soppressata or kielbasa; roasted chestnuts and/or dried apricots, for serving.

    1. Rub cut side of garlic on inside of large Dutch oven or heavy-bottomed saucepan, preferably cast iron, rubbing the bottom and halfway up the sides. Add wine and bring to a simmer over medium-high heat.
    2. Meanwhile, in a large bowl, toss cheeses with cornstarch. Add a handful at a time to simmering wine, stirring until first handful melts before adding next. Reduce heat to medium and stir constantly until cheese is completely melted. Add kirsch, if using, and heat until bubbling, about 1 to 2 minutes. Season with salt, pepper and nutmeg, if desired. Serve with crusty bread and other accompaniments.
    Yield: 6 main course servings or 10 appetizer servings.

    Tuesday, December 20, 2011

    Rainbow Cookies

    Growing up I went to the bakery on Sunday mornings with my Dad.  We would get a dozen plain rolls nothing more- well maybe sometimes a sugar cookie.  We weren't a family brought up with traditional bakery sweets. At Christmas we would get a platter of cookies, sometimes a 7 layer cake and a lemon cake with chocolate icing from Walter's in Woodside, NY.   When I was 14 I lied about my age and got my first job at Georgette's Bakery on Dutch Broadway in Elmont, NY.   That's where I tasted the likes of Napoleons, Eclairs, lace cookies, black and white cookies (put thru the bread slicer to get the perfect slices) and RAINBOW COOKIES!  Rainbow cookies were my favorite!!!   A few years ago my friend Jen Novak made them for an office party. They were fantastic and I couldn't believe they were homemade.  I found a recipe and wanted to try it, but every time I looked at the recipe I was too intimidated.  This year I finally tackled them for a cookie swap with my book club.  After reading the reviews by others on the website, I tweaked the recipe (see comments below) and they turned out great.  They do take time, but the results are worth it. I got lots of compliments including from my friend's mom, Mrs. Sote, who wouldn't believe they weren't from a bakery. The proof is in the pictures below.  They are tried and true.
    http://allrecipes.com/Recipe/Rainbow-Cookies/Detail.aspx?prop24=etaf


    Rainbow Cookies


    Ingredients

    • 8 ounces almond paste (I used 10 ounces of almond filling instead of paste easier to work with)
    • 1 cup butter, softened
    • 1 cup white sugar
    • 4 eggs, separated
    • 2 cups all-purpose flour
    • 6 drops red food coloring
    • 6 drops green food coloring
    • 1/4 cup seedless red raspberry jam
    • 1/4 cup apricot jam (I used only raspberry, but would try the apricot next time)
    • 1 cup semisweet chocolate chips, melted (I added 4 ounces of heavy cream to this so it was easier to cut the cookies)

    Directions

    1. Preheat oven to 350 degrees F (175 degrees C). Line three 9x13 inch baking pans with parchment paper.
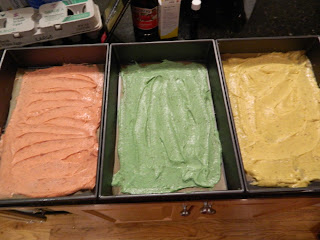
    2. In a large bowl, break apart almond paste with a fork, and cream together with butter, sugar, and egg yolks. When mixture is fluffy and smooth, stir in flour to form a dough. In a small bowl, beat egg whites until soft peaks form. Fold egg whites into the dough. Divide dough into 3 equal portions. Mix one portion with red food coloring, and one with green food coloring. Spread each portion into one of the prepared baking pans.
    3. Bake 10 to 12 minutes in the preheated oven, until lightly browned. Carefully remove from pan and parchment paper, and cool completely on wire racks.
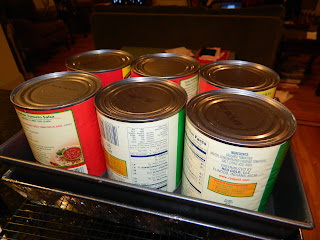
    4. Place green layer onto a piece of plastic wrap large enough to wrap all three layers. Spread green layer with raspberry jam, and top with uncolored layer. Spread with apricot jam, and top with pink layer. Transfer layers to a baking sheet, and enclose with plastic wrap. Place a heavy pan or cutting board on top of wrapped layers to compress. Chill in the refrigerator 8 hours, or overnight.
    5. Remove plastic wrap. Top with melted chocolate chips, and refrigerate 1 hour, or until chocolate is firm. Slice into small squares to serve.


    Wednesday, December 7, 2011

    Penne with Shrimp and Herbed Cream Sauce

    I found this recipe on foodnetwork.com in 2008.  At the time, I was training for the NYC Marathon and was craving carbs after my long runs.  I was always online searching for a new pasta dishes.  I found this one and it looked easy, quick and delicious. Knowing it was a Giandi De Laurentiis creation, I had no doubt I would love it and it didn't disappoint!
    I woke up last Saturday with a pasta craving and decided to try it again with an added twist -prosciutto!   I added it to the pan after the shrimp and found it really added flavor.  It's light for a cream sauce and the red pepper gives it the perfect kick. Leave it standing for a few minutes to thicken after taking it off the heat. I think I may try it with lobster next time.
    My son Ryan had the leftovers after basketball practice last night and said it was better than my Shrimp Scampi- which is one of his favorites!  He said Joe McCool needs to try this one at the firehouse...it's sure to be a hit.
    This is another Tried and True for sure!!
    Next up-Yankee Pot Roast from Grandma's Country Restaurant in Albany, NY ...stay tuned.

    Penne with Shrimp and Herbed Cream Sauce

    Giada De Laurentiis

    Ingredients

    • 1 pound penne pasta
    • 1/4 cup olive oil
    • 1 pound medium shrimp, peeled, and deveined
    • cloves garlic, minced
    • 1/2 teaspoon kosher salt, plus extra for seasoning
    • 1/2 teaspoon freshly ground black pepper, plus extra for seasoning
    • 1 (15-ounce) can whole tomatoes, drained, roughly chopped
    • 1/2 cup chopped fresh basil leaves
    • 1/2 cup chopped fresh flat-leaf parsley
    • 1/4 teaspoon crushed red pepper flakes
    • 1 cup white wine
    • 1/3 cup clam juice
    • 3/4 cup heavy whipping cream
    • 1/2 cup grated Parmesan
    • optional **I added 2 ounces of chopped Prosciutto

    Directions

    Bring a large pot of salted water to a boil over high heat. Add the pasta and cook until tender but still firm to the bite, stirring occasionally, about 8 to 10 minutes. Drain the pasta and set aside.
    In a large skillet, heat the oil over medium-high heat. Add the shrimp, garlic, 1/2 teaspoon of salt, and 1/2 teaspoon of pepper. Cook, stirring frequently until the shrimp turn pink and is cooked through, about 3 minutes. Using a slotted spoon, remove the shrimp and set aside (this is when I added and sauteed the Prosciutto).
    Add the tomatoes, 1/4 cup basil, 1/4 cup parsley, and the red pepper flakes. Cook for 2 minutes, stirring constantly. Add the wine, clam juice, and heavy cream. Bring the mixture to a boil. Reduce the heat to medium-low and simmer for 7 to 8 minutes until the sauce thickens. Add 1/4 cup of the Parmesan, the cooked shrimp, the cooked pasta, and the remaining herbs. Toss together until all ingredients are coated. Season, to taste, with salt and pepper.
    Transfer the pasta to a large serving bowl. Sprinkle with the remaining cheese and serve immediately.


    Site Design By Designer Blogs